Step1
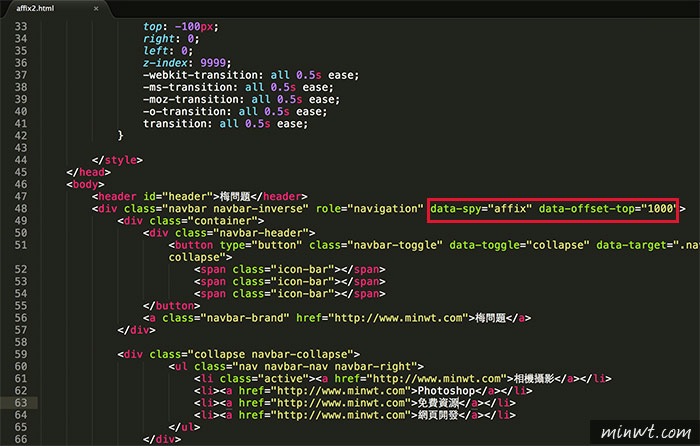
首先,在導覽列後方,設定區塊滑到指定的高度後,加入affix的類別名稱,這邊梅干設定了1000像素。
Step2
接著在下方的動畫效果,加入CSS樣式中。
.fixed-strip.affix {
top: 0;
}
.fixed-strip {
position: fixed;
top: -100px;
right: 0;
left: 0;
z-index: 9999;
-webkit-transition: all 0.5s ease;
-ms-transition: all 0.5s ease;
-moz-transition: all 0.5s ease;
-o-transition: all 0.5s ease;
transition: all 0.5s ease;
}
top: 0;
}
.fixed-strip {
position: fixed;
top: -100px;
right: 0;
left: 0;
z-index: 9999;
-webkit-transition: all 0.5s ease;
-ms-transition: all 0.5s ease;
-moz-transition: all 0.5s ease;
-o-transition: all 0.5s ease;
transition: all 0.5s ease;
}
Step3
接著在/body前,加入javascript判斷,當上方的藍色版頭區塊,大於滾動高度再把動態的效果加入,這時再滾動到1000像素時,就會將剛所設定的動畫效果給套進去啦!。
$(window).scroll(function(){
var win_h = $(document).scrollTop();
if(win_h >= $('#header').height()){
$('.navbar').addClass('fixed-strip');
}else{
$('.navbar').removeClass('fixed-strip');
}
});
var win_h = $(document).scrollTop();
if(win_h >= $('#header').height()){
$('.navbar').addClass('fixed-strip');
}else{
$('.navbar').removeClass('fixed-strip');
}
});
Step4
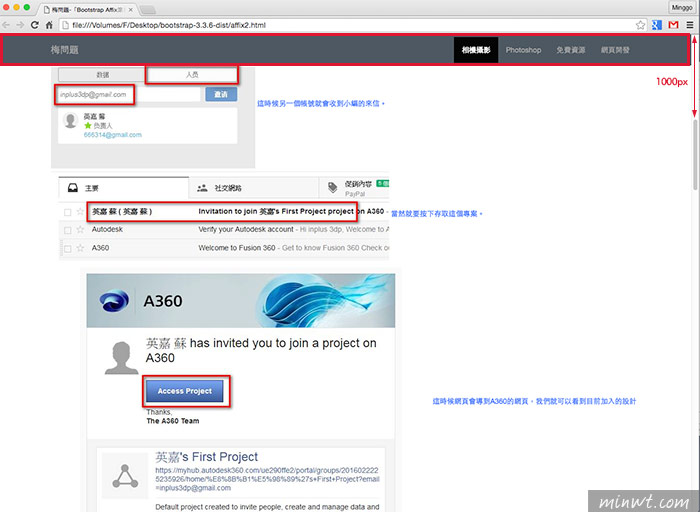
當完成時,畫面滾動到1000像素時,上方的導覽列,就會由向上向下滑出,當小於1000時,就會再向上滑動收回。
[範例預覽] [範例下載]